Imagine having eyes and ears on your devices, no matter where you are. That is what remote IoT monitoring gives you. It's about staying connected to your smart gadgets, sensors, and little computers, even when you're far away. This kind of setup lets you check on things, gather information, and even make changes from a distance, which is pretty handy, you know?
For many folks tinkering with smart home projects or industrial sensors, getting a good view of what's happening on their small machines, like a Raspberry Pi, is a big deal. Secure Shell, or SSH, comes into play here. It is a really important tool that lets you talk to your devices over a network in a safe way. It means you can send commands, grab data, and manage your little computers without having to be right there with them, which is quite a convenience.
This article will walk you through how to set up and use SSH for watching over your IoT gadgets, especially if you're using a Raspberry Pi. We will look at connecting from both Ubuntu and Windows computers, and also how to pull data and files from your devices. You will find out how to keep things safe and what to do if you hit a snag. So, let's get started, shall we?
- Filyzilla
- Farzi Full Movie Download Filmyzilla
- Hollywood Sci Fi Movies In Hindi Dubbed Download Filmywap Filmyzilla
- Criminal Justice Season 3 Full Episode Filmyzilla
- Filmyzilla Hollywood Bollywood
Table of Contents
- What is Remote IoT Monitoring?
- Why SSH for IoT Devices?
- Raspberry Pi: The Heart of Many IoT Projects
- Getting Started: Setting Up Your Raspberry Pi for Remote Access
- Accessing Your Raspberry Pi from Ubuntu
- Accessing Your Raspberry Pi from Windows
- Basic IoT Monitoring Concepts via SSH
- Downloading Data and Files Remotely
- Security Considerations for Remote IoT Monitoring
- Troubleshooting Common SSH Issues
- Conclusion
What is Remote IoT Monitoring?
Remote IoT monitoring, in a way, is like having a watchful eye on your smart gadgets and systems from anywhere. It lets you keep track of things that are happening with your devices without needing to be physically next to them. This is super useful for things like checking the temperature in your greenhouse or seeing if a machine in a distant factory is still working properly, which is pretty neat.
Think about a small weather station you set up in your garden. With remote monitoring, you could be on vacation and still see the current temperature, humidity, or even how much rain has fallen. This kind of ability is very important for many different uses, from keeping an eye on home security to managing big industrial setups. It gives you peace of mind, too, you know?
The main idea is to get information from your devices and send it to a central place where you can see it and make sense of it. This often involves small computers, sensors, and a way to send data over the internet. The goal is to make sure everything is running smoothly and to spot any problems quickly, so you can act fast, that is for sure.
- Aagmaalorg
- Filmywap Mp4moviez Filmyzilla In Hindi
- Hindi Dubbed Movies Download Filmyzilla
- The Conjuring Movie Download In Hindi Filmyzilla
- Filmyzilla Horror Movies
Why SSH for IoT Devices?
SSH, or Secure Shell, is a network method that lets you operate computers over an unsecured network in a safe way. For IoT gadgets, this safety is a very big deal. When you connect to your Raspberry Pi using SSH, all the information going back and forth is encrypted. This means it is much harder for someone to snoop on your commands or the data your device is sending, which is a good thing.
Beyond just being secure, SSH is also incredibly flexible. You can use it to run commands on your remote device as if you were sitting right in front of it. This could mean starting a program, changing a setting, or even restarting the whole system. It's a bit like having a remote control for your little computer, you know?
Another really useful part of SSH is its ability to move files. You can easily send data logs from your IoT device to your main computer or upload new software updates to the device. This makes managing your devices from afar much simpler and more efficient, too it's almost a must-have tool for remote work with these small machines.
Raspberry Pi: The Heart of Many IoT Projects
The Raspberry Pi is a tiny, affordable computer that has become a favorite for many IoT projects. Its small size, low power use, and the fact that it can run a full operating system make it incredibly versatile. People use them for all sorts of things, from smart mirrors to home automation hubs, and even for industrial control systems, you know?
One of the best things about the Raspberry Pi is its GPIO pins. These are special connections that let you hook up sensors, lights, motors, and other electronic parts directly to the computer. This means you can easily build devices that interact with the real world, which is a big part of what IoT is all about, that is for sure.
The community around Raspberry Pi is also huge and very helpful. There are tons of guides, forums, and examples available online, making it easier for new people to get started. This support system makes it a great choice for anyone wanting to get into remote IoT monitoring, as you can often find solutions to problems pretty quickly, too.
Getting Started: Setting Up Your Raspberry Pi for Remote Access
Before you can start monitoring your Raspberry Pi from afar, you need to get it ready. This involves putting an operating system on it and making sure SSH is turned on. It's a pretty straightforward process, but taking your time with each step helps a lot, you know?
Installing Ubuntu Server on Your Raspberry Pi
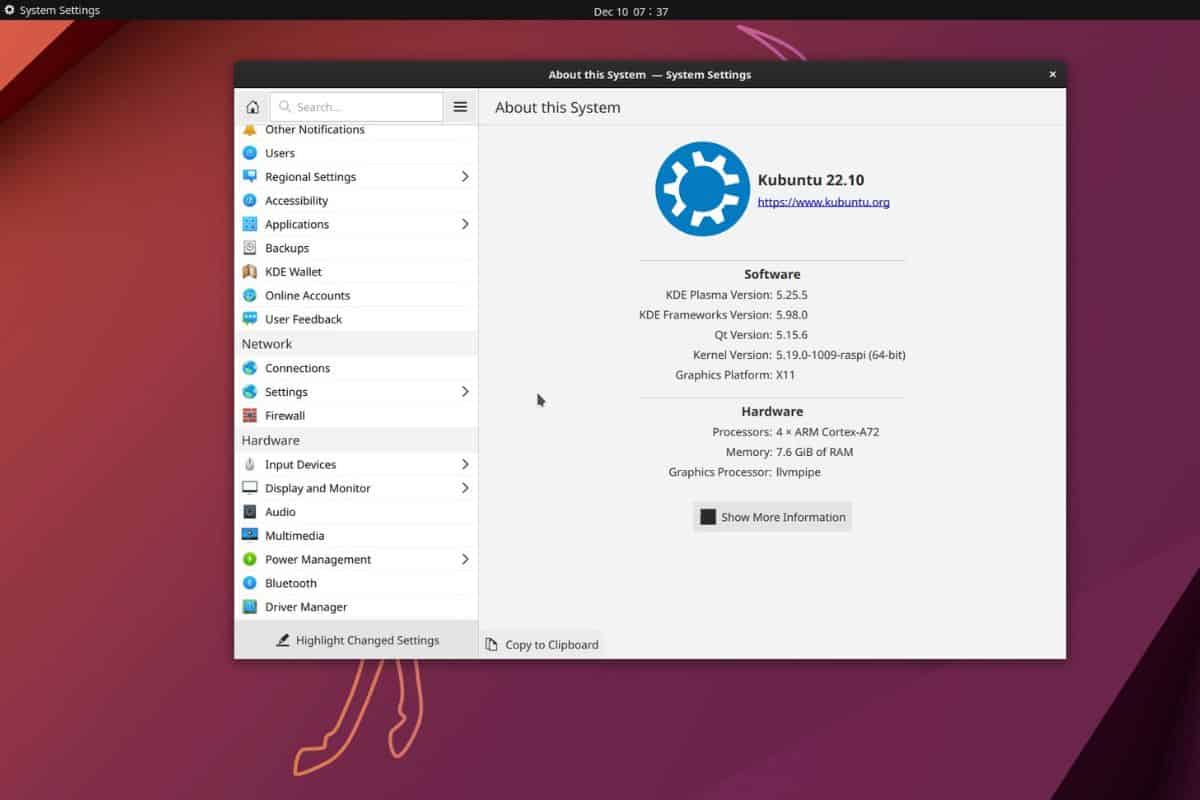
While Raspberry Pi OS (formerly Raspbian) is a popular choice, Ubuntu Server is also a fantastic option for IoT projects, especially if you are already familiar with Ubuntu on your main computer. It's a lightweight version that does not have a graphical interface, which saves resources for your IoT tasks. You can download the image from the official Ubuntu website, which is pretty easy.
To put Ubuntu Server on your SD card, you will need a tool like Raspberry Pi Imager or Balena Etcher. Just select the Ubuntu Server image for Raspberry Pi, pick your SD card, and let the tool do its work. This process basically copies the operating system onto the card so your Pi can start up with it, you see.
Once the image is written, put the SD card into your Raspberry Pi. Connect it to power and a network cable (or set up Wi-Fi later). The first boot might take a little while, so be patient. You will probably see some text scrolling on a connected screen if you have one, which is just the system getting ready, you know?
Enabling SSH on Raspberry Pi OS
If you are using Raspberry Pi OS, SSH is usually turned off by default for security reasons. To turn it on, you have a few ways. The simplest is to create an empty file named `ssh` (no file extension) in the boot directory of your SD card before you put it in the Pi. When the Pi starts up, it sees this file and turns SSH on automatically, which is quite convenient.
Alternatively, once your Raspberry Pi is up and running and you have a keyboard and screen connected, you can open a terminal and type `sudo raspi-config`. Inside this menu, go to "Interface Options" and then select "SSH" to enable it. This is a very common way to adjust many settings on your Pi, too.
For Ubuntu Server on Raspberry Pi, SSH is typically enabled by default. You will just need to make sure you know the username and password for the initial login, which is usually `ubuntu` for both. It's a good idea to change this default password right away for safety, as you might expect.
Network Configuration for Remote Access
For reliable remote access, your Raspberry Pi needs a steady network connection and an address that you can reach. If your Pi is using Wi-Fi, make sure it connects to your network. For a wired connection, just plug in an Ethernet cable. It's usually a good idea to give your Raspberry Pi a static IP address on your local network. This means its address won't change, making it easier to find consistently, you know?
You can set a static IP through your router's settings (often called DHCP reservation) or by editing network configuration files on the Pi itself. This avoids the IP address changing every time the Pi restarts, which can be a real headache when you're trying to connect remotely, you see.
If you plan to access your Pi from outside your home network, you might need to set up "port forwarding" on your router. This tells your router to send incoming SSH requests from the internet to your Raspberry Pi's specific IP address. Be very careful with port forwarding, though, as it opens up your network to the outside world. It's wise to use strong security measures if you do this, as you might imagine.
Accessing Your Raspberry Pi from Ubuntu
Connecting to your Raspberry Pi from an Ubuntu computer is quite simple because Ubuntu has SSH tools built right in. You won't need to download any extra programs, which is pretty handy. Just open a terminal, and you're almost ready to go, you know?
Using the SSH Command Line Tool
The main tool you'll use is the `ssh` command. To connect, you just type `ssh username@ip_address` into your terminal. For example, if your Raspberry Pi's username is `pi` and its IP address is `192.168.1.100`, you would type `ssh pi@192.168.1.100`. The first time you connect, your computer might ask you to confirm the remote host's fingerprint. Just type `yes` to continue, which is typical.
After that, it will ask for the password for the user on your Raspberry Pi. Type it in, and you won't see the characters appear, which is normal for security. Once you hit Enter, you should be logged into your Raspberry Pi's command line. You are now controlling your Pi from your Ubuntu machine, which is pretty cool, isn't it?
If your Raspberry Pi is using a different SSH port than the standard one (port 22), you'll need to specify it with the `-p` option. For instance, if your port is 2222, you'd type `ssh -p 2222 pi@192.168.1.100`. This is a very good security practice, too, you know?
Basic SSH Commands for Ubuntu
Once you are connected via SSH, you can run almost any command you would run if you were sitting directly in front of your Raspberry Pi. You can list files with `ls`, change directories with `cd`, or update your system with `sudo apt update && sudo apt upgrade`. It's a full command-line experience, you see.
To run a command on the Pi without actually logging in, you can add the command right after your SSH connection string. For example, `ssh pi@192.168.1.100 "ls /home/pi"` would show you the contents of the `pi` user's home directory without needing to enter an interactive session. This is useful for quick checks, you know?
For copying files between your Ubuntu computer and your Raspberry Pi, the `scp` command is very helpful. `scp /path/to/local/file pi@192.168.1.100:/path/to/remote/location` will send a file from your Ubuntu machine to your Pi. To get a file from your Pi, just reverse the order: `scp pi@192.168.1.100:/path/to/remote/file /path/to/local/location`. This makes moving data around pretty simple, too.
Accessing Your Raspberry Pi from Windows
Connecting to your Raspberry Pi from a Windows computer is also very possible, though it might need a little extra setup compared to Ubuntu. Windows does not have SSH built in quite the same way, but there are excellent tools available that make it easy. So, you're covered, you know?
Introducing PuTTY for Windows
PuTTY is a very popular free SSH client for Windows. You can download it from its official website. Once downloaded, it is a single executable file, so there is no complex installation. Just run it, and you'll see a window where you can enter your connection details, which is pretty straightforward.
In PuTTY, you will enter your Raspberry Pi's IP address in the "Host Name (or IP address)" field. Make sure the "Port" is set to 22 (or whatever custom port your Pi uses) and "Connection type" is set to SSH. Then, you can click "Open" to start the connection. A new window will pop up asking for your username and password, just like in a Linux terminal, you see.
You can also save your connection settings in PuTTY so you don't have to type them every time. This is very convenient if you connect to your Pi often. Just give your session a name in the "Saved Sessions" box and click "Save." It makes things much quicker, too.
Using Windows Subsystem for Linux (WSL)
For a more native Linux experience on Windows, you can use the Windows Subsystem for Linux (WSL). This lets you run a full Linux environment, like Ubuntu, directly within Windows. Once WSL is set up, you can use the `ssh` command line tool just like you would on a regular Ubuntu machine, which is pretty cool.
To enable WSL, you typically go to "Turn Windows features on or off" in the Control Panel and check "Windows Subsystem for Linux." After a restart, you can download a Linux distribution (like Ubuntu) from the Microsoft Store. Once installed, open the WSL terminal, and you'll have access to the `ssh` command, as you might expect.
This method gives you the full power of Linux command-line tools right on your Windows computer, making it very flexible for remote IoT monitoring. It's a bit like having the best of both worlds, you know?
File Transfer from Windows
For transferring files between your Windows computer and your Raspberry Pi, WinSCP is an excellent graphical tool. It provides an easy-to-use interface for copying files back and forth, much like a regular file explorer. You can download it from the WinSCP website. It's a very visual way to manage files, too.
When you open WinSCP, you'll enter your Raspberry Pi's IP address, username, and password. It will then show you two panes: one for your local Windows files and one for your Raspberry Pi's files. You can just drag and drop files between them, which makes file transfers very simple and intuitive, you see.
If you are using WSL, you can also use the `scp` command directly within your WSL terminal, just like you would on an Ubuntu machine. This gives you command-line control over file transfers, which can be useful for scripting or automating tasks, too.
Basic IoT Monitoring Concepts via SSH
Once you have a good SSH connection to your Raspberry Pi, you can start doing real remote IoT monitoring. This means checking on your sensors, sending commands to devices, and collecting data. It's pretty exciting to see your remote system responding to your inputs, you know?
Checking Sensor Data Remotely
Many IoT projects involve sensors that gather information like temperature, humidity, or light levels. Often, a Python script or another program on your Raspberry Pi reads these sensors and saves the data to a file or prints it to the console. You can use SSH to run these scripts or view the data files. For example, `ssh pi@192.168.1.100 "cat /home/pi/sensor_data.txt"` would display the contents of a data file directly in your terminal, which is very helpful.
If your sensor data is being logged continuously, you might want to use the `tail -f` command. This command shows you the end of a file and then keeps displaying new lines as they are added. So, `ssh pi@192.168.1.100 "tail -f /var/log/sensor_readings.log"` would give you a live view of your sensor data as it comes in. This is a very dynamic way to monitor, too.
You can also create simple scripts on your Raspberry Pi that collect data and then use SSH to trigger them or retrieve their output. This gives you a lot of control over what information you gather and how often you get it, you know?
Running Remote Commands to Control Devices
Beyond just checking data, SSH lets you send commands to control physical devices connected to your Raspberry Pi. For instance, if you have a relay connected to your Pi's GPIO pins, you could have a Python script that turns a light on or off. You can then run this script remotely via SSH. So, `ssh pi@192.168.1.100 "python /home/pi/control_light.py on"` could switch on a light in your home, which is pretty amazing.
This ability to send commands opens up a world of possibilities for home automation, smart agriculture, or even managing remote robots. You can trigger actions based on sensor readings or simply control things manually from your computer. It's a very powerful feature, too, you see.
Just make sure the scripts or programs you're running on your Pi are designed to be executed from the command line. This makes them easy to use with SSH, which is almost a standard practice for these kinds of tasks.
Simple Data Logging and Retrieval
For continuous monitoring, your Raspberry Pi will likely be logging data over time. This could be temperature readings every minute, or status updates from a machine. These logs are often saved in text files or simple databases on the Pi. SSH is your way to get those logs. You can use `scp` to download entire log files to your local computer for later analysis, which is very useful.
You might also want to set up your Raspberry Pi to compress old log files to save space, and then you can download those compressed files. This helps manage storage on your small device. Tools like `gzip` or `zip` can do this on the Pi, and then `scp` can pull them down, you know?
For more advanced data handling, you could have your Pi upload data to a cloud service directly, but for simple setups, pulling data via SSH is a very direct and effective method. It gives you full control over your data, too, which is a good thing.
Downloading Data and Files Remotely
Getting your collected data and other important files from your Raspberry Pi to your main computer is a key part of remote IoT monitoring. SSH provides secure ways to do this, ensuring your information stays private. It's a pretty straightforward process once you know the commands, you know?
Using scp for Direct File Transfer
The `scp` command, which stands for Secure Copy, is a command-line tool that lets you copy files between computers over an SSH connection. It's like the `cp` command, but for remote machines. To download a file from your Raspberry Pi to your local computer, you would use a command like this: `scp pi@192.168.1.100:/path/to/remote/file /path/to/local/destination`. This pulls the file right over, you see.
For example, if you have a sensor log file called `temp_log.csv` in the `/home/pi/data` directory on your Pi and you want to save it to your local computer's `Documents` folder, you would type: `scp pi@192.168.1.100:/home/pi/data/temp_log.csv ~/Documents/`. It's very direct and efficient, too.
You can also use `scp` to copy entire folders by adding the `-r` option (for recursive). So, `scp -r pi@192.168.1.100:/home/pi/logs /home/user/my_pi_logs` would copy the whole `logs` folder and everything inside it to your local machine. This is very useful for getting batches of data, you know?
Using sftp for Interactive File Management
While `scp` is great for quick, direct copies, `sftp` (SSH File Transfer Protocol) offers a more interactive way to manage files. It's like a command-line FTP client, but secure. You start an `sftp` session by typing `sftp pi@192.168.1.100` in your terminal. Once connected, you'll see an `sftp>` prompt, which is pretty distinct.
From there, you can use commands similar to those you'd use in a regular file system. `ls` lists remote files, `cd` changes remote directories, `get filename` downloads a file, and `put filename` uploads a file. This interactive mode can be very helpful if you need to browse around your Pi's file system before deciding what to download, too.
For Windows users, WinSCP (mentioned earlier) uses SFTP under the hood and provides that nice graphical interface. It's often the preferred choice for those who like a visual way to handle files, you know?
Automating Data Transfer
For ongoing monitoring, you might want to automate the process of downloading data. On your Raspberry Pi, you can use `cron` jobs to schedule scripts that collect data and perhaps prepare it for transfer. For example, a cron job could run every hour to gather sensor readings and save them to a new file, which is very convenient.
On your local Ubuntu or Windows machine (using WSL), you can write a script that uses `scp` to regularly pull these
Related Resources:


Detail Author:
- Name : Jules Mertz
- Username : guido.auer
- Email : lesch.jarred@yahoo.com
- Birthdate : 2001-03-31
- Address : 19611 Tianna Motorway South Anitahaven, NE 18310-3717
- Phone : 1-781-684-3681
- Company : Gibson and Sons
- Job : Copy Writer
- Bio : Ea ut excepturi voluptas. Sit eius voluptatibus est. Accusantium ducimus quam amet repellendus. Vel nam provident voluptas.
Socials
linkedin:
- url : https://linkedin.com/in/hyman9032
- username : hyman9032
- bio : Atque perspiciatis dicta vero vitae.
- followers : 3503
- following : 44
twitter:
- url : https://twitter.com/hyman_schiller
- username : hyman_schiller
- bio : Molestiae fugiat totam voluptatibus ad dignissimos. Ipsum harum et laboriosam incidunt quibusdam.
- followers : 3107
- following : 1506
facebook:
- url : https://facebook.com/schillerh
- username : schillerh
- bio : Dolorum autem iure itaque pariatur sed sit atque.
- followers : 1364
- following : 1430
tiktok:
- url : https://tiktok.com/@schillerh
- username : schillerh
- bio : Nemo cumque ea id nostrum. Nemo nisi in sed quae molestias.
- followers : 4653
- following : 1498
